
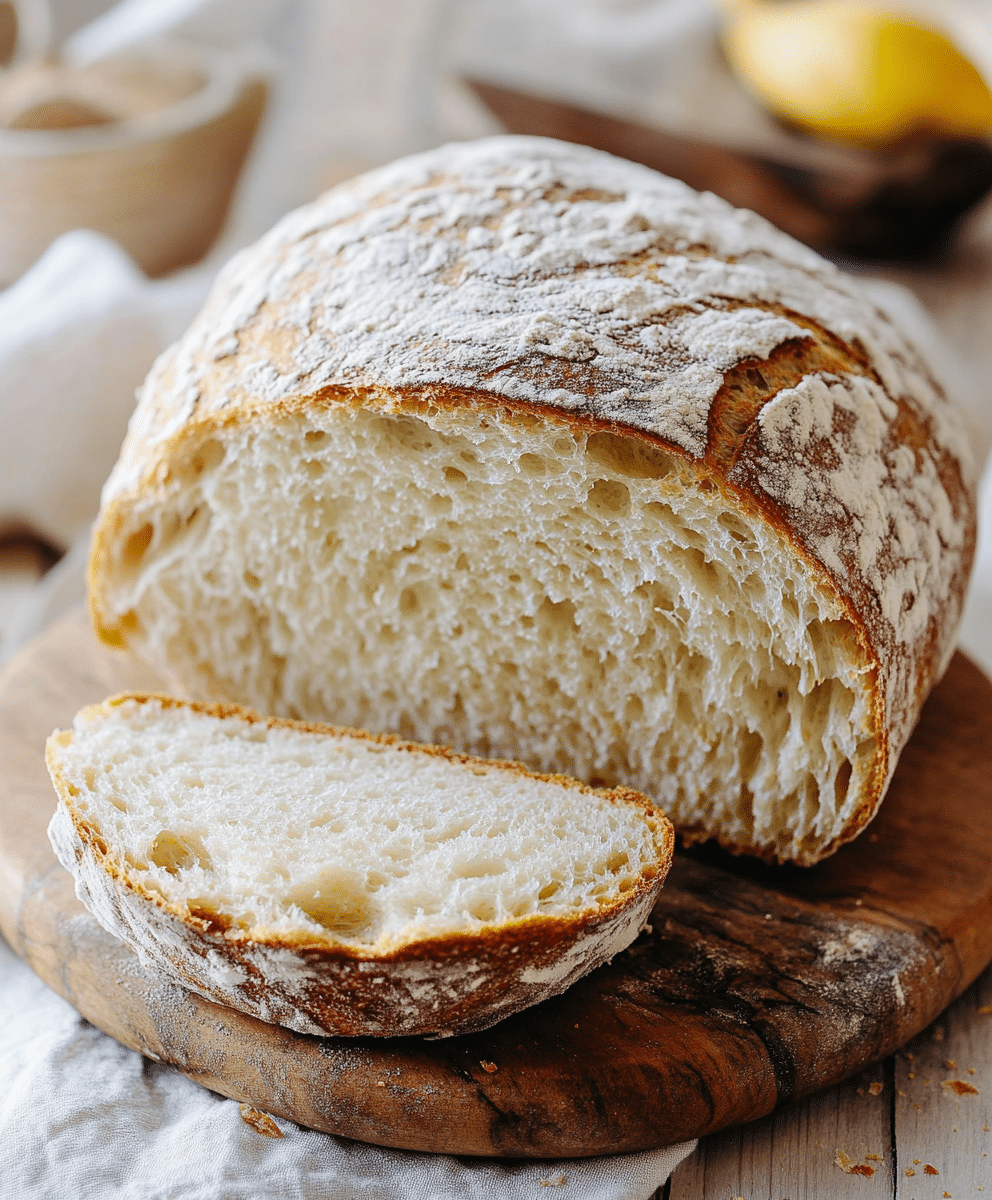
There's something magical about the smell of freshly baked sourdough bread filling your kitchen — warm, nutty, and just a little tangy. That crisp, golden crust gives way to a soft, chewy interior that’s nothing short of bakery-level perfection.
My journey with sourdough started during a particularly rainy weekend when I finally decided to tackle the challenge of baking with a natural starter. Now, I bake this homemade sourdough bread almost weekly — it's become a calming ritual and a delicious reward. It's surprisingly simple once you get the hang of it, and the flavor is unmatched by anything store-bought.
Let’s dive into what makes this sourdough recipe so special.
Why You'll Love This Homemade Sourdough Bread Recipe
Get ready to fall head over heels for this crusty, flavorful loaf. This recipe is more than just a bread — it’s a baking experience that feels both rewarding and satisfying.
First off, the ingredient list couldn’t be simpler. With just flour, water, salt, and a mature sourdough starter, this recipe embraces the beauty of baking with basics. There's no yeast involved — just a wild fermentation that gives the bread its signature tang.
It’s a perfect make-ahead option. The slow fermentation process means you can mix the dough in the evening and bake it the next day. It fits seamlessly into your schedule while delivering complex flavor.
Homemade sourdough is incredibly cost-effective. If you've ever been shocked by the price of artisan bread at the grocery store, you'll love knowing that this one costs just pennies per loaf.
Finally, it’s a fun and fulfilling baking project. Whether you're a seasoned baker or a curious beginner, sourdough teaches patience, observation, and a deep appreciation for the craft of breadmaking.
Next, let's break down the ingredients and see what makes each one essential to the perfect loaf.
Ingredients Notes
Homemade sourdough bread is all about quality over quantity. With just a handful of ingredients, the key is understanding how each one contributes to flavor, structure, and texture.
Bread flour is the foundation of this recipe. It has a higher protein content than all-purpose flour, which means stronger gluten development. That’s what gives sourdough its iconic chew and beautiful rise. You can also mix in some whole wheat flour for added depth, but stick with at least 70% bread flour for best results.
Your sourdough starter is the heart of this bread. It’s a living culture of wild yeast and bacteria that naturally ferments the dough. A healthy, active starter will bubble and double in size within 4 to 6 hours of feeding — that’s how you’ll know it’s ready to use.
Filtered water might seem like a small detail, but it matters. Chlorinated tap water can inhibit your starter and slow fermentation. If your tap water is heavily treated, consider using filtered or bottled water to keep your starter happy and active.
Sea salt not only seasons the bread but also strengthens the gluten network. It’s best to add the salt after the dough has had some time to rest, a step known as autolyse. This allows the flour to absorb water first and helps you achieve better texture.
As for equipment, you’ll need a few essentials: a large mixing bowl, a kitchen scale for accuracy, a Dutch oven (or baking steel/stone with steam), and ideally a bench scraper for shaping. A banneton or bowl with a floured towel helps support the dough during its final proof.
How To Make This Homemade Sourdough Bread
Making sourdough bread is more about technique than speed — but don’t worry, I’ll walk you through every step of the way.
Start by combining your starter, flour, and water in a large bowl. Mix it just until no dry flour remains — you’re not kneading yet. Let the dough rest for about 30 minutes to an hour; this step is called the autolyse. It helps hydrate the flour and kick-starts gluten development.
Once the dough has rested, sprinkle in the salt and a little extra water if needed. Now it’s time to mix with your hands, gently squeezing and folding the dough until the salt is fully incorporated. This is a messy stage, but it’s crucial for structure.
Over the next few hours, perform stretch and folds every 30 minutes. To do this, gently pull one edge of the dough up and fold it over itself. Rotate the bowl and repeat a few times. These folds build strength in the dough without overhandling it. After the final fold, let the dough bulk ferment until it’s puffy and has grown by about 50%.
When it’s ready, turn the dough out onto a floured surface and shape it into a tight ball. Let it rest for 20 minutes, then perform the final shape. Place the dough seam-side up into a floured proofing basket or bowl, cover, and refrigerate overnight.
The next day, preheat your oven to 475°F with your Dutch oven inside. When hot, carefully transfer your dough onto parchment paper, score the top with a sharp blade, and load it into the Dutch oven. Bake covered for 20 minutes, then uncovered for another 25-30 minutes until deeply golden.
Let your loaf cool completely before slicing — as hard as it is to wait, it’s essential for the crumb to set properly. The result? A tangy, crusty loaf that crackles as you cut into it and delivers flavor in every bite.
Storage Options
Homemade sourdough stays fresh longer than standard bread thanks to its natural acidity. Store the cooled loaf at room temperature, wrapped in a clean kitchen towel or paper bag. Avoid plastic, which traps moisture and softens the crust.
For longer storage, you can slice the loaf and freeze it. Just place parchment between slices, pop them in a freezer bag, and pull out what you need. They toast up beautifully straight from the freezer.
If you’re storing a whole loaf, wrap it tightly in foil and freeze it. To reheat, pop the frozen loaf into a 350°F oven for 30-40 minutes until it’s warmed through and the crust crisps back up.
To reheat a day-old loaf, a few minutes in a hot oven or toaster oven revives the crust and makes it taste fresh again. Avoid the microwave — it’ll soften the bread instead of bringing back the crisp texture.
Variations and Substitutions
One of the joys of sourdough baking is how adaptable it is. Once you’ve mastered the basic loaf, it’s easy (and fun!) to try new twists.
Try incorporating whole wheat or rye flour into the dough for a heartier loaf. Even a 10-20% substitution adds nutty flavor and rustic texture. Just keep in mind that these flours ferment faster, so adjust your timing slightly.
Add-ins are another great way to mix it up. A handful of roasted garlic, olives, or herbs folded in during the bulk fermentation stage brings flavor bursts in every bite. Just be sure the ingredients aren’t too wet, or they’ll affect the dough’s structure.
You can also change the hydration level. Higher hydration (more water) yields a more open crumb and thinner crust, but it’s trickier to handle. If you're feeling confident, try pushing your dough from 70% to 75% hydration for an airier texture.
For a sweeter twist, mix in dried cranberries and chopped walnuts, or swirl in a bit of cinnamon sugar. These are perfect for breakfast toast and make beautiful gifts.
Once you’re comfortable with the process, don’t be afraid to experiment. Sourdough is both science and art — and every loaf teaches you something new.
PrintHomemade Sourdough Bread Recipe

This homemade sourdough bread recipe is a beginner-friendly guide to creating a deliciously crusty, tangy loaf using natural fermentation. With just flour, water, salt, and an active starter, this artisan-style bread delivers unbeatable flavor and texture. Learn how to make sourdough bread from scratch, including bulk fermentation, shaping, and baking tips.
- Prep Time: 1 hour (plus fermentation/proofing time)
- Cook Time: 45 minutes
- Total Time: About 18 hours (including overnight proofing)
- Yield: 1 large loaf
- Category: Bread
- Method: Baking
- Cuisine: American, European
- Diet: Gluten Free
Ingredients
-
500g bread flour
-
375g water (75% hydration)
-
100g active sourdough starter (20%)
-
10g salt
Instructions
-
In a large bowl, mix flour and water. Let rest for 1 hour (autolyse).
-
Add sourdough starter and mix until incorporated.
-
Add salt and mix well.
-
Perform 4 sets of stretch and folds every 30 minutes.
-
Bulk ferment for 4–6 hours at room temp until dough doubles.
-
Shape dough into a round loaf. Place in a floured proofing basket.
-
Cover and refrigerate overnight (cold proof).
-
Preheat oven with Dutch oven to 475°F (245°C).
-
Score the loaf and bake covered for 20 minutes, then uncovered for 25 more minutes.
-
Cool on a wire rack before slicing.
Notes
-
Use a mature, active sourdough starter for best results.
-
Adjust hydration based on flour type and environment.
-
Optional: add seeds or herbs for flavor variations.
-
Store cooled bread in a paper bag for up to 3 days.
Nutrition
- Serving Size: 1 slice
- Calories: 160
- Sugar: 0.5g
- Sodium: 150mg


Leave a Reply