
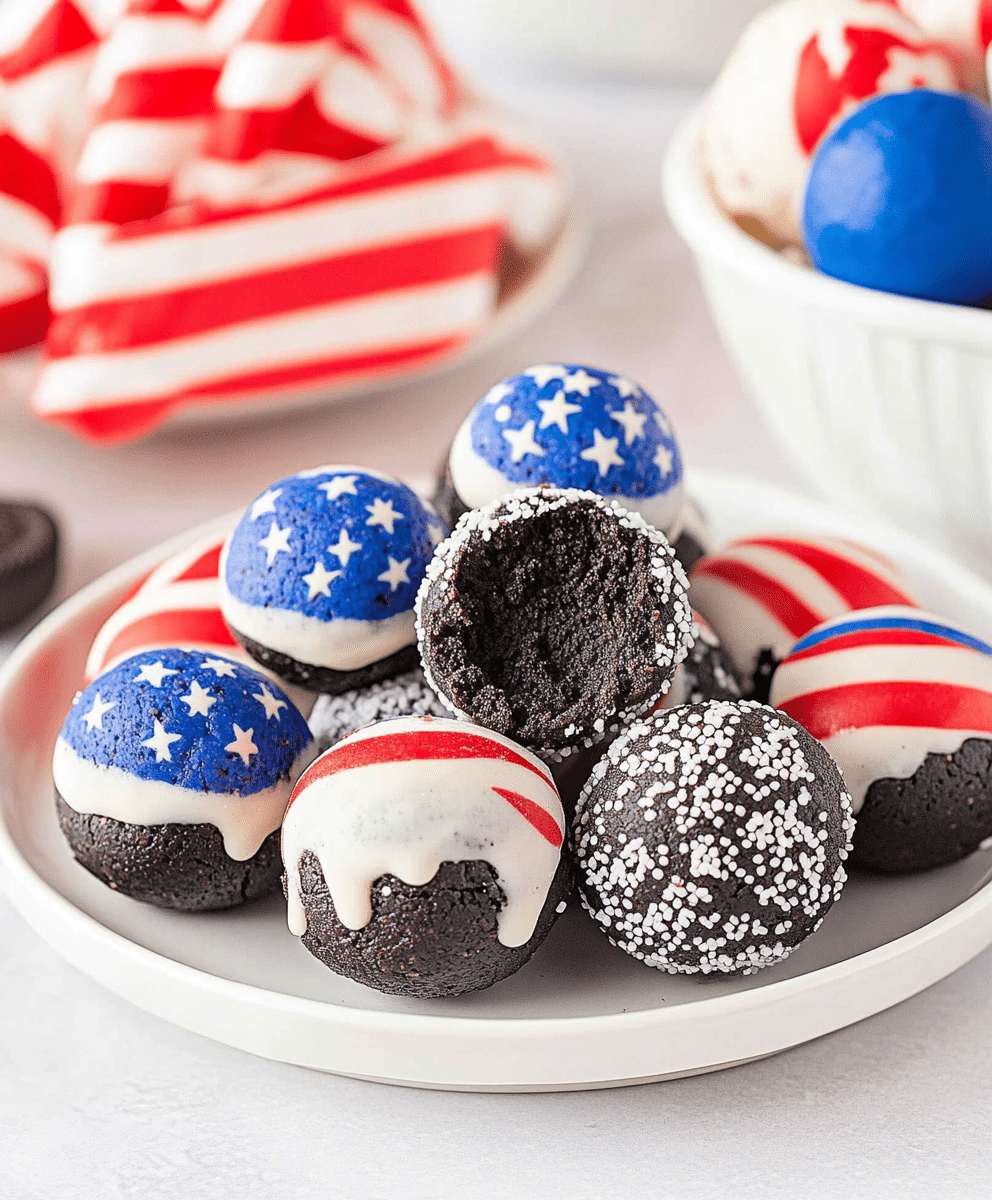
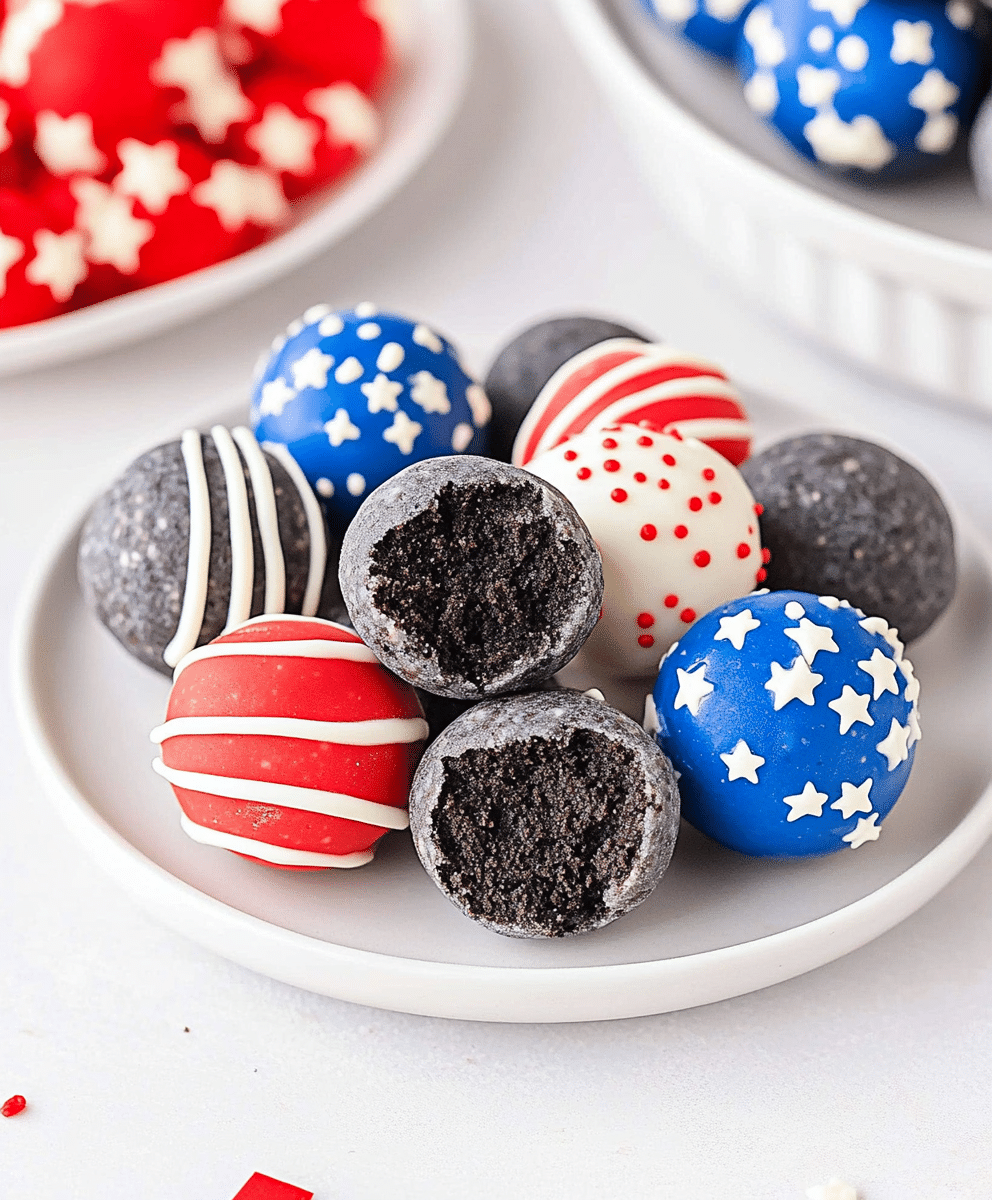
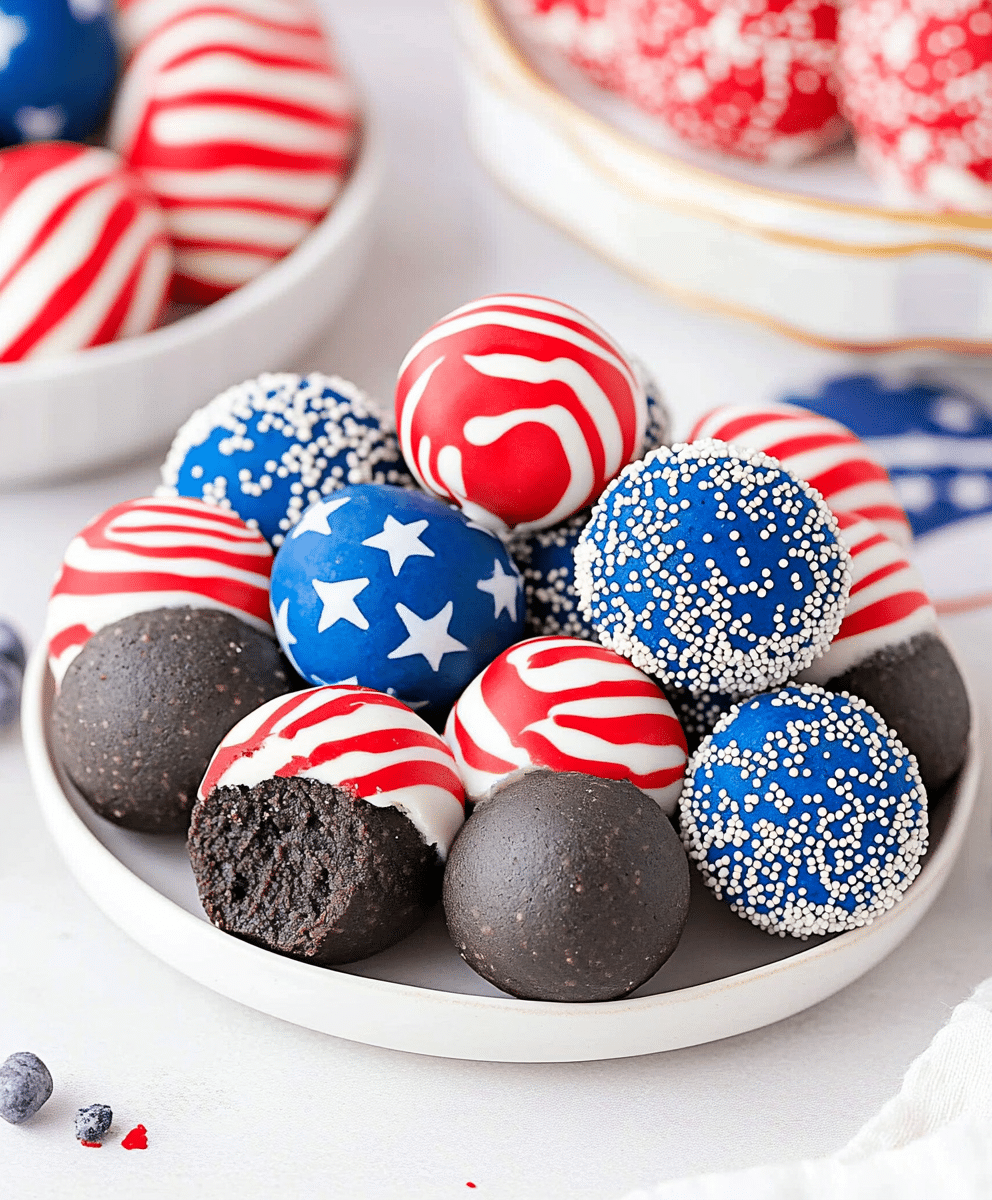
There’s something magical about bite-sized treats that are both irresistibly delicious and visually festive. These Patriotic Oreo Balls are the perfect no-bake dessert to light up your Fourth of July, Memorial Day, or any red, white, and blue celebration.
I started making these during one particularly hot summer when turning on the oven just wasn’t an option. With just a handful of ingredients and zero baking required, they quickly became a holiday staple in our house. Plus, they’re always the first dessert to disappear from the party table. Let’s dive into what makes these Oreo balls a must for your next patriotic gathering.
Get ready for a sweet treat that checks all the boxes—easy, fun, kid-friendly, and full of crowd-pleasing flavor.
Why You'll Love This Patriotic Oreo Balls Recipe
Get ready to fall in love with your new favorite festive dessert. These Patriotic Oreo Balls are more than just adorable—they’re a total breeze to whip up, and they deliver a rich, chocolatey punch in every bite.
First of all, they’re no-bake, which is a huge win during the summer months when the last thing anyone wants to do is heat up the kitchen. With just a little melting and mixing, you’ve got a batch of sweet treats ready for chilling.
They’re also super easy to make. Even if you’ve never made Oreo balls before, this is a perfect place to start. No fancy techniques, no complicated steps—just simple ingredients and straightforward prep.
Let’s talk about how budget-friendly they are. With just a pack of Oreos, a brick of cream cheese, and some candy melts or chocolate, you can feed a crowd for just a few dollars.
And of course, these little bites are perfectly customizable. While we’re using red, white, and blue for this version, you can easily swap out the colors for different themes, holidays, or team parties. It’s a blank canvas for your creativity.
So if you're looking for a dessert that delivers both fun and flavor with minimal effort, these Oreo balls are about to become your go-to treat.
Ingredients Notes
The beauty of this recipe lies in its simplicity. You don’t need a long shopping list or specialty ingredients—just a few staples that come together to make something spectacular.
Oreos are the heart and soul of this recipe. You’ll use an entire 14.3-ounce package, cream filling included. Crushed into a fine crumb, they become the base of the mixture and provide that deep chocolate flavor that pairs so beautifully with the candy coating.
Cream cheese is what binds everything together. Make sure it’s softened to room temperature before mixing—it’ll blend more smoothly with the crushed cookies and create a dough-like texture that’s easy to shape.
Candy melts in red, white, and blue give these Oreo balls their festive flair. You can usually find these at craft stores or in the baking aisle around major holidays. If you prefer, you can use white chocolate chips with gel food coloring, but candy melts tend to be more reliable for dipping.
Sprinkles are optional but highly recommended. Patriotic star-shaped or red, white, and blue jimmies add a playful finish and extra crunch to every bite. Kids especially love helping with this part!
You won’t need much in terms of special equipment, but a cookie scoop or small ice cream scoop will help you form uniform balls. Also, having a fork or dipping tool makes coating them in melted chocolate much easier.
How To Make This Patriotic Oreo Balls Recipe
Making these festive Oreo balls is a straightforward process that’s great for involving little helpers or prepping ahead of time. Here’s how to bring these treats to life.
Start by adding your Oreos to a food processor. Pulse until they’re finely crushed—you’re looking for a sand-like texture with no big chunks. If you don’t have a food processor, you can put the cookies in a zip-top bag and crush them with a rolling pin.
Next, transfer the crushed Oreos to a large mixing bowl and add the softened cream cheese. Use a hand mixer or a sturdy spatula to fully combine the two. It might look a bit dry at first, but keep mixing—it’ll turn into a thick, uniform dough.
Once combined, use a small cookie scoop or tablespoon to portion out the dough. Roll each portion into a smooth ball between your palms. Place the finished balls onto a parchment-lined baking sheet and chill them in the freezer for about 20-30 minutes. This helps them firm up so they hold their shape during dipping.
While the balls chill, melt your candy melts in separate bowls according to package instructions. Microwave in short intervals, stirring frequently to prevent overheating. Once melted and smooth, you’re ready to dip.
Remove the Oreo balls from the freezer and dip each one into the melted candy coating using a fork. Tap off any excess and transfer back to the lined baking sheet. While the coating is still wet, sprinkle with red, white, and blue decorations. Repeat until all the balls are coated and decorated.
Let the coating set completely—this usually takes about 15-20 minutes at room temperature or 5-10 minutes in the fridge. From start to finish, you’re looking at just under an hour, most of it hands-off. Once set, these Oreo balls are ready to impress!
Storage Options
One of the best things about Oreo balls is how well they store, making them a perfect make-ahead treat for busy holiday weekends.
Keep your finished Oreo balls in an airtight container in the refrigerator. They’ll stay fresh and delicious for up to one week, making them ideal for prepping a few days ahead of your event.
For longer storage, you can freeze them. Place the Oreo balls in a single layer on a baking sheet and freeze until solid, then transfer them to a freezer-safe container or zip-top bag. They’ll last up to two months this way.
When you’re ready to enjoy them, just thaw the frozen Oreo balls in the refrigerator overnight. They’ll taste just as good as the day you made them.
To re-serve, there’s no reheating needed—just bring them out of the fridge about 15 minutes before serving for the perfect texture and temperature.
Variations and Substitutions
These Oreo balls are as flexible as they are festive. With a few simple tweaks, you can adapt them to fit any occasion or dietary preference.
Want to make them dairy-free? Swap out the regular cream cheese for a vegan version. There are some great plant-based cream cheese options that work beautifully in this recipe.
For a different flavor profile, try using Golden Oreos instead of classic chocolate. The lighter vanilla flavor pairs wonderfully with patriotic colors and gives the treat a totally different twist.
Not a fan of candy melts? You can dip the balls in melted white chocolate and use food coloring to achieve your red and blue tones. Just be careful with the consistency—white chocolate can seize if overheated.
You can also play around with mix-ins. Add a little peppermint extract for a cool twist, or stir in crushed freeze-dried strawberries for a summery burst of flavor.
The possibilities are endless, so don’t be afraid to get creative. Whether you stick with the classic version or experiment with your own spin, these Oreo balls are guaranteed to be a hit.
PrintPatriotic Oreo Balls Recipe

Celebrate Independence Day with these fun and festive Patriotic Oreo Balls! Made with crushed Oreo cookies, cream cheese, and colorful candy melts, these no-bake treats are easy to make and perfect for parties. With red, white, and blue decorations, they’re a sweet way to show your patriotic spirit!
- Prep Time: 30 minutes
- Cook Time: 0 minutes (No-bake)
- Total Time: 45 minutes (includes chilling)
- Yield: About 24 Oreo balls
- Category: Dessert
- Method: No-Bake
- Cuisine: American
- Diet: Vegetarian
Ingredients
-
36 Oreo cookies (about 1 standard package)
-
8 oz cream cheese, softened
-
1½ cups white candy melts or almond bark
-
Red and blue candy melts
-
Patriotic sprinkles (optional)
Instructions
-
Crush Oreos into fine crumbs using a food processor.
-
Mix Oreo crumbs with softened cream cheese until well combined.
-
Roll mixture into 1-inch balls and place on a parchment-lined baking sheet.
-
Freeze for 15–20 minutes until firm.
-
Melt white candy coating and dip each ball until fully covered.
-
Melt red and blue candy melts separately and drizzle over dipped Oreo balls.
-
Add patriotic sprinkles before candy coating sets, if using.
-
Refrigerate until firm. Serve chilled.
Notes
-
For smoother coating, add a teaspoon of coconut oil to candy melts.
-
Store in an airtight container in the fridge for up to a week.
-
Perfect make-ahead dessert for July 4th parties or BBQs.
Nutrition
- Serving Size: 1 ball
- Calories: 110
- Sugar: 9g
- Sodium: 85mg


Leave a Reply